Dockerize and deploy Node.js applications using GitHub Actions and Packages
Prerequisites
- Installed Node.js and npm
- Installed and configured Docker
- Existing repository on Github
- Configured droplet on DigitalOcean
What are Github Actions?
- GitHub Actions is an API for cause and effect on GitHub: orchestrate any workflow, based on any event, while GitHub manages the execution, provides rich feedback, and secures every step along the way.
What is Docker?
- Docker is an open platform for developing, shipping, and running applications. Docker enables you to separate your applications from your infrastructure so you can deliver software quickly. With Docker, you can manage your infrastructure in the same ways you manage your applications.
What is DigitalOcean Droplet?
- DigitalOcean Droplets are Linux-based virtual machines (VMs) that run on top of virtualized hardware. Each Droplet you create is a new server you can use, either standalone or as part of a larger, cloud-based infrastructure.
In this tutorial, we’ll use Github Packages as a container registry for our docker image.
Note: GitHub Container Registry is currently in public beta and subject to change. During the beta, storage and bandwidth are free. To use GitHub Container Registry, you must enable the feature preview. For more information, see “About GitHub Container Registry” and “Enabling improved container support.”
Prepare our Node.js application
Install dependencies
First of all, we need to create a package.json file.
The package.json file defines the dependencies that should be installed with your application. To create a package.json file for your app, run the command npm init in the root directory of your app. It will walk you through creating a package.json file. You can skip any of the prompts by leaving them blank.
$ cd path-to-your-repo
$ npm init
...
name: (nodejs-deploy)
version: (1.0.0)
description: Node.js on DO using Docker and Github Actions
entry point: (server.js)
test command:
git repository:
keywords:
author: First Last <first.last@example.com>
license: (ISC) MIT
...The generated package.json file looks like this:
{
  "name": "nodejs-deploy",
  "version": "1.0.0",
  "description": "Node.js on DO using Docker and Github Actions",
  "author": "First Last <first.last@example.com>",
  "main": "server.js",
  "scripts": {
    "start": "node server.js"
  }
}
To install dependencies, use npm install <pkg>. It installs the package and also adds it as a dependency in the package.json file. For example, to install express, you would type npm install express.
$ npm install express
Now your package.json file should look like this:
{
  "name": "nodejs-deploy",
  "version": "1.0.0",
  "description": "Node.js on DO using Docker and Github Actions",
  "author": "First Last <first.last@example.com>",
  "main": "server.js",
  "scripts": {
    "start": "node server.js"
  }
}
Create server.js file
As you may see, we declared that our entry point is a server.js file. Let’s create one.
This file would contain an express application with one simple GET endpoint, which would allow us to test deployment.
First of all, let’s import express and declare our endpoint:
'use strict';

const express = require('express');

const PORT = 8080;
const HOST = '0.0.0.0';

const app = express();
app.get('/', (_, res) => {
  res.send({
    message: "It's on DigitalOcean!",
  });
});

const server = app.listen(PORT, HOST, () => {
  console.log(`Running on http://${HOST}:${PORT}`);
});
$ npm start
Running on http://0.0.0.0:8080
Now let’s check if our application is listening for requests by accessing http://localhost:8080. I’ll use Postman for this.
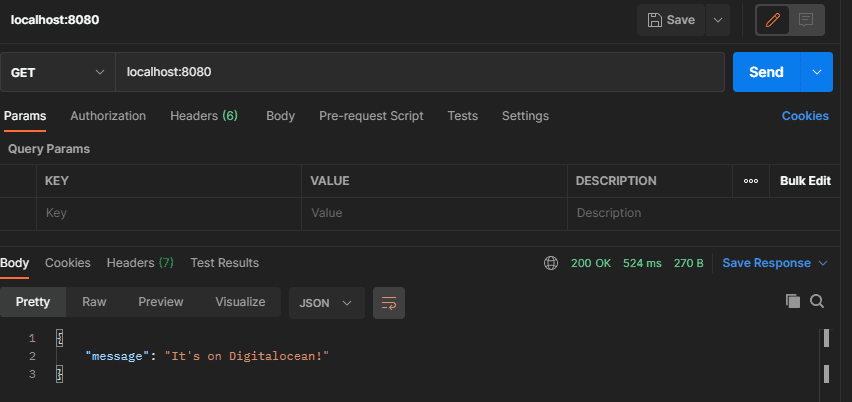
And it works!
Now we can proceed to dockerizing our application.
Dockerize Node.js app
To achieve our goal, first of all, we need to create the Dockerfile. According to the documentation, a Dockerfile is a text document that contains all the commands a user could call on the command line to assemble an image.
Simple Dockerfile
FROM node

# Create app directory
WORKDIR /usr/src/app
COPY . /usr/src/app
RUN npm install
CMD "npm" "start"
You can already build and run your container and it will work, but maybe we can do it better? Of course!
Let’s specify the version of the base image:
FROM node:14-alpine
Then let’s take a look at the dependency installation. We’re preparing a production build of the application, so we don’t need dev dependencies to be installed. We can fix it by changing RUN npm install to:
# Install only production dependencies from lock file
RUN npm ci --only=production
Another step is to ensure that all frameworks and libraries are using optimal configuration for production. We can do it by adding this line to our Dockerfile:
# Optimise for production
ENV NODE_ENV production
Don’t run containers as root
It’s really important to keep your process without security risks!
Friends don’t let friends run containers as root!
So, let’s change few more lines in our Dockerfile:
# Copy app files with permissions for node user
COPY --chown=node:node . /usr/src/app

# friends don’t let friends run containers as root!
USER node
Our application is listening on port 8080, so we need to expose this port from the container:
EXPOSE 8080
At this point our Dockerfile looks like this:
FROM node:14-alpine

# Optimise for production
ENV NODE_ENV production

# Create app directory
WORKDIR /usr/src/app

# Copy app files
COPY --chown=node:node . /usr/src/app

# Install only production dependencies
RUN npm ci --only=production

# friends don’t let friends run containers as root!
USER node

# Make port 8080 accessible outside of the container
EXPOSE 8080
CMD "npm" "start"
Let’s build and run our image:
$ docker build . -t nodejs-deploy
$ docker run -d -p 8080:8080 --name=nodejs-deploy nodejs-deploy:latest
You can check if it’s running by typing the command:
$ docker psAnd you can see the container’s logs with the following command:
$ docker logs nodejs-deploy
Graceful Shutdown
Node.js has integrated web server capabilities. Plus, with Express, these can be extended even more.
Unfortunately, Node.js does not handle shutting itself down very nicely out of the box. This causes many issues with containerized systems.
When a Node.js application receives an interrupt signal, also known as SIGINT, or CTRL+C, it will cause an abrupt process kill, unless any event handlers were set, of course, to handle it in different behavior. This means that connected clients to a web application will be immediately disconnected.
Let’s simulate this problem by creating another endpoint with delayed response:
app.get('/delayed', async (_, res) => {
  const SECONDS_DELAY = 60000;

  await new Promise((resolve) => {
    setTimeout(() => resolve(), SECONDS_DELAY);
  });

  res.send({ message: 'delayed response' });
});
Run this application and once it’s running send a simple HTTP request to this endpoint.
Hit CTRL+C in the running Node.js console window and you’ll see that the curl request exited abruptly. This simulates the same experience your users would receive when containers tear down.
Part 1
To fix this we need to allow requests to be finished. Let’s explain it to our Node.js server:
// Graceful shutdown
function closeGracefully(signal) {
  console.log(`Received signal to terminate: ${signal}`);

  server.close(() => {
    // await db.close() if we have a db connection in this app
    // await other things we should cleanup nicely
    console.log('Http server closed.');
    process.exit(0);
  });
}

process.on('SIGINT', closeGracefully);
process.on('SIGTERM', closeGracefully);
This calls server.close(), which will instruct the Node.js HTTP server to:
- Not accept any more requests.
- Finish all running requests.
It will do this on SIGINT (when you press CTRL+C) or on SIGTERM (the standard signal for a process to terminate).
You may have a question “What if a request is taking too much time?”. So if the container is not stopped, Docker and Kubernetes will run a SIGKILL after a couple of seconds (usually 30) which cannot be handled by the process itself, so this is not a concern for us.
Part 2
Now in our Dockerfile, we’re starting our application with the command npm start. Unfortunately, there is a big problem with this:
If yarn or npm get a SIGINT or SIGTERM signal, they correctly forward the signal to spawned child process (in this case node server.js). However, it does not wait for the child’s processes to stop. Instead, yarn/ npm immediately stop themselves.
The solution is not to run the application using npm and instead use node directly:
CMD ["node", "server.js"]
But there still is a problem. Docker is running our process as PID 1. According to Node.js Docker Workgroup Recommendations:
Node.js was not designed to run as PID 1 which leads to unexpected behavior when running inside of Docker. For example, a Node.js process running as PID 1 will not respond to SIGINT ( CTRL-C) and similar signals.
We can use a tool called dumb-init to fix it. It’ll be invoked as PID 1 and then will spawn our node.js process as another process. Let’s add to our Dockerfile:
# Add tool which will fix init process
RUN apk add dumb-init
...
CMD ["dumb-init", "node", "server.js" ]
So the final version of our Dockerfile looks like this:
FROM node:14-alpine

# Add tool which will fix init process
RUN apk add dumb-init

# Optimise for production
ENV NODE_ENV production

# Create app directory
WORKDIR /usr/src/app

# Copy app files
COPY --chown=node:node . /usr/src/app

# Install only production dependencies
RUN npm ci --only=production

# friends don’t let friends run containers as root!
USER node

# Make port 8080 accessible outside of container
EXPOSE 8080
CMD ["dumb-init", "node", "server.js" ]
And now we can proceed to our Github Actions!
Configure the Github Actions
Introduction
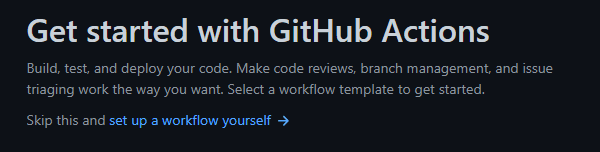
Go to your repository, select the Actions tab. You will see that GitHub is proposing you different workflows, but it’s not our approach. Click on set up a workflow yourself.
We’ll be redirected to the page with the initial config, it’ll be committed to the main ( master) when we’ll finish our configuration.
Let’s talk a little about the initial config, it should look like this:
# This is a basic workflow to help you get started with Actions

name: CI

# Controls when the action will run.
on:
  # Triggers the workflow on push or pull request events but only for the master branch
  push:
    branches: [master]
  pull_request:
    branches: [master]

  # Allows you to run this workflow manually from the Actions tab
  workflow_dispatch:

# A workflow run is made up of one or more jobs that can run sequentially or in parallel
jobs:
  # This workflow contains a single job called "build"
  build:
    # The type of runner that the job will run on
    runs-on: ubuntu-latest

    # Steps represent a sequence of tasks that will be executed as part of the job
    steps:
      # Checks-out your repository under $GITHUB_WORKSPACE, so your job can access it
      - uses: actions/checkout@v2

      # Runs a single command using the runner's shell
      - name: Run a one-line script
        run: echo Hello, world!

      # Runs a set of commands using the runner's shell
      - name: Run a multi-line script
        run: |
          echo Add other actions to build,
echo test, and deploy your project.name– is the name of our workflowon– is the block where we describe what will trigger our workflow. By default, it’s triggered when apushis performed to themasterbranch (in this casemasterbranch is accessed) or when aPull Requestis performed into themasterbranch (in this case will be accessed source branch, ex.feature/TASK-1). And we can trigger it manually, it’s allowed by theworkflow_dispatchproperty.jobs– is the block in which our jobs are configured. They can run one by one, or simultaneously (ex. deploying backend and frontend at once in mono repo).runs-on– The type of machine to run the job on. The machine can be either a GitHub-hosted runner or a self-hosted runner.steps– the place where our logic lives. Each step runs in its process in the runner environment and has access to the workspace and filesystem.uses– selects an action to run as part of a step in your job. An action is a reusable unit of code. In this case, is called predefined by GitHub actionactions/checkout@v2which allow us tocheckoutthe source branch (masteror another one that triggered the workflow)name– is the name of the step. It’ll be shown in the progress of workflow execution.run– runs command-line programs using the operating system’s shell. If you do not provide aname, the step name will default to the text specified in theruncommand. It can execute a one-line command or multiline commands as well.
More detailed documentation you can find by accessing Workflow Syntax Documentation
Build and push
Now we have enough knowledge to start working on our configuration. Let’s define the name of our workflow and when it’ll be triggered. In our case workflow should be executed only on changes in the master branch or manually, so our declarations will look like this:
name: Build, Push and Deploy Node.js app

# Controls when the action will run.
on:
  # Triggers the workflow on push events but only for the master branch
  push:
    branches: [master]

  # Allows you to run this workflow manually from the Actions tab
  workflow_dispatch:
Now we need to declare some env variables to be able to reuse them in our configuration to avoid repeating the same things:
env:
  REGISTRY: docker.pkg.github.com # we will push our docker-image to the GitHub packages
  REPO: tfarras/nodejs-deploy/nodejs-image # is the name of our image which will be used to push or pull it
  CONTAINER: nodejs-image # name of the container which will be used to stop or start the container
It’s time to define our jobs. In our case there will be two jobs, one will build and push the image to the registry and another to pull and run the container on our droplet.
To build and push the container to the registry we’ll use the docker/build-push-action@v1 action, you can find detailed documentation here.
jobs:
  push_to_registry: # name of our first job
    name: Push Docker image to GitHub Packages # User-friendly name which is displayed in the process of execution
    runs-on: ubuntu-latest # this job should be run on the ubuntu-latest runner
    steps:
      - name: Check out the repo # name of the first step, it'll `checkout` the latest commit in the master branch
        uses: actions/checkout@v2

      - name: Push to GitHub Packages # name of the second step
        uses: docker/build-push-action@v1 # declare that we're going to use this action
        with: # block which receives configuration for the used action
          username: ${{ github.actor }} # github username
          password: ${{ secrets.GITHUB_TOKEN }} # github password or github access token
          registry: ${{ env.REGISTRY }} # our REGISTRY env variable declared in the section above
          repository: ${{ env.REPO }} # our REPO env variable
          tag_with_ref: true # Automatically tags the built image with the git reference. (from the doc)
At this point our workflow config should look like this:
name: Build, Push and Deploy Node.js app

# Controls when the action will run.
on:
  # Triggers the workflow on push events but only for the master branch
  push:
    branches: [master]

  # Allows you to run this workflow manually from the Actions tab
  workflow_dispatch:

env:
  REGISTRY: docker.pkg.github.com
  REPO: tfarras/nodejs-deploy/nodejs-image
  CONTAINER: nodejs-image

jobs:
  push_to_registry:
    name: Push Docker image to GitHub Packages
    runs-on: ubuntu-latest
    steps:
      - name: Check out the repo
        uses: actions/checkout@v2

      - name: Push to GitHub Packages
        uses: docker/build-push-action@v1
        with:
          username: ${{ github.actor }}
          password: ${{ secrets.GITHUB_TOKEN }}
          registry: ${{ env.REGISTRY }}
          repository: ${{ env.REPO }}
          tag_with_ref: true
As you can see we’re using github.actor and secrets.GITHUB_TOKEN, and you most probably have questions, where we declared these variables. Answer: we don’t.
These variables are predefined by GitHub.
github.actor– is the login of the user that initiated the workflow run and takes part in thegithubcontext. You can read more about it heresecrets.GITHUB_TOKEN– is a token provided by GitHub. It’s created on each workflow run. You can use the GITHUB_TOKEN to authenticate in a workflow run. Learn more here.
This action can already be used if you want just to build and push your container. It’s suitable if you just working on a docker-image and it should be only stored in the registry, and you need to be able to pull it when you need it.
But in our case we need also to deploy it, so let’s configure our second job.
Deploy: Pull and run
Our second job has the responsibility to connect to our droplet via ssh, pull the container and run the docker container. It’ll also run on ubuntu-latest runner and it should start only after our previous job called push_to_registry. So, our job declaration will look like this:
deploy: # name of the second job
  needs: [push_to_registry] # specify that it's dependent on the push_to_registry job
  name: Deploy to DigitalOcean # user-friendly name of the job
  runs-on: ubuntu-latest # specify runner
Before steps configuration, we need to add some more variables, namely SSH_KEY, SSH_USER, and SSH_HOST. These variables will be used to authenticate our ssh connection to the droplet. But like other secrets of our application, it’s a very bad idea to store them in the repository files, so we need another, more secure, way to declare them. And GitHub provides one – it’s called Secrets and you can find them in the Settings tab of your repository in GitHub.
Secrets can be of two types: Repository and Environment secrets. You can learn more about them in the documentation. In our case, we’ll use Repository secrets, so go to the configuration page and click on the New repository secret.
As specified before, we need three variables:
SSH_KEY– it’s your private key used to access the droplet.SSH_USER– username used to access the droplet viasshSSH_HOST– host of your droplet
Once they’re set, you’ll see the following result. These secrets cannot be seen again even by the repository owner, they can be only updated or removed.
Now we can continue with our steps configuration. To perform SSH connection we’ll use webfactory/ssh-agent action. More details and description you can find here.
Let’s configure the SSH connection:
steps:
  - name: Setup SSH connection # name of this step
    uses: webfactory/ssh-agent@v0.5.1 # action which is used
    with:
      ssh-private-key: ${{ secrets.SSH_KEY }} # provide private key which we added before
According to documentation, these actions will not update the .known-hosts file for us, so let’s declare another step which will update this file using ssh-keyscan.
- name: Adding Known Hosts
  run: ssh-keyscan -H ${{ secrets.SSH_HOST }} >> ~/.ssh/known_hosts # run shell command which will scan and add hosts
Now it’s time to add a command which will pull our image to the droplet:
- name: Pull latest container
  run: |
    ssh ${{secrets.SSH_USER}}@${{secrets.SSH_HOST}} "docker pull ${{env.REGISTRY}}/${{env.REPO}}:latest"
In this command, we specified that we need to connect via ssh using our user and host and run the command to pull the latest version of our docker image.
Now we need to run our container:
- name: Start docker container
  run: |
    ssh ${{secrets.SSH_USER}}@${{secrets.SSH_HOST}} "docker run -p 8080:8080 -d --restart unless-stopped --name=${{env.CONTAINER}} ${{env.REGISTRY}}/${{env.REPO}}:latest"
In this step, we also connect via ssh but let’s take a closer look at the docker command
docker run– runs the container itself-p 8080:8080– specifies that we need to bind exposed from the container port (8080) with the local port of the machine(droplet).-d– flag is used to run the container in detached mode--restart unless-stopped– specifies that the container should be restarted unless it’s stopped manually. It also will start on the machine startup.--name=${{env.CONTAINER}}– specifies the name under which container will be started${{env.REGISTRY}}/${{env.REPO}}:latest– specifies which image we need to run as a container
At this point our configuration will look like this:
name: Build, Push and Deploy Node.js app

# Controls when the action will run.
on:
  # Triggers the workflow on push events but only for the master branch
  push:
    branches: [master]

  # Allows you to run this workflow manually from the Actions tab
  workflow_dispatch:

env:
  REGISTRY: docker.pkg.github.com
  REPO: tfarras/nodejs-deploy/nodejs-image
  CONTAINER: nodejs-image

jobs:
  push_to_registry:
    name: Push Docker image to GitHub Packages
    runs-on: ubuntu-latest
    steps:
      - name: Check out the repo
        uses: actions/checkout@v2

      - name: Push to GitHub Packages
        uses: docker/build-push-action@v1
        with:
          username: ${{ github.actor }}
          password: ${{ secrets.GITHUB_TOKEN }}
          registry: ${{ env.REGISTRY }}
          repository: ${{ env.REPO }}
          tag_with_ref: true
  deploy:
    needs: [push_to_registry]
    name: Deploy to DigitalOcean
    runs-on: ubuntu-latest
    steps:
      - name: Setup SSH connection
        uses: webfactory/ssh-agent@v0.5.1
        with:
          ssh-private-key: ${{ secrets.SSH_KEY }}

      - name: Adding Known Hosts
        run: ssh-keyscan -H ${{ secrets.SSH_HOST }} >> ~/.ssh/known_hosts

      - name: Pull latest container
        run: |
          ssh ${{secrets.SSH_USER}}@${{secrets.SSH_HOST}} "docker pull ${{env.REGISTRY}}/${{env.REPO}}:latest"
      - name: Start docker container
        run: |
          ssh ${{secrets.SSH_USER}}@${{secrets.SSH_HOST}} "docker run -p 8080:8080 -d --name=${{env.CONTAINER}} ${{env.REGISTRY}}/${{env.REPO}}:latest"
Look pretty good now, isn’t it? But it has some issues which will fail our workflow if we’ll run it now.
To pull containers from the GitHub container registry we need to authenticate to this one. We’ll do it also using github.actor and secrets.GITHUB_TOKEN variables. So let’s add one more step before container pulling:
- name: Login to the GitHub Packages Docker Registry
  run: ssh ${{secrets.SSH_USER}}@${{secrets.SSH_HOST}} "docker login ${{env.REGISTRY}} -u ${{github.actor}} -p ${{secrets.GITHUB_TOKEN}}"
But for security reasons, it’s not a good idea to leave docker authenticated to a registry on the remote machine, so we need to add at the end of our workflow to logout from the registry:
- name: Logout from the GitHub Packages Docker Registry
  run: ssh ${{secrets.SSH_USER}}@${{secrets.SSH_HOST}} "docker logout ${{env.REGISTRY}}"
With these steps, we solved the authentication issue, but there is one more. On the second run, our workflow will fail.
Why? The reason is simple because the port and name of our container are already used from the previous run.
How to fix it? The fix is pretty simple, we just need to stop and remove the previous container. Let’s add two more steps just before starting our container:
- name: Stop deployed container
  continue-on-error: true
  run: |
    ssh ${{secrets.SSH_USER}}@${{secrets.SSH_HOST}} "docker stop ${{env.CONTAINER}}"
- name: Remove deployed container
  continue-on-error: true
  run: |
    ssh ${{secrets.SSH_USER}}@${{secrets.SSH_HOST}} "docker rm ${{env.CONTAINER}}"
You probably have a question:” Why do we need continue-on-error property here?“. The reason is that these commands will throw an error if there isn’t any running or existing container with the name of our container. It’s not a problem for our workflow, so we’ll just skip these errors.
The final version of our workflow configuration will look like this:
name: Build, Push and Deploy Node.js app

# Controls when the action will run.
on:
  # Triggers the workflow on push events but only for the master branch
  push:
    branches: [master]

  # Allows you to run this workflow manually from the Actions tab
  workflow_dispatch:

env:
  REGISTRY: docker.pkg.github.com
  REPO: tfarras/nodejs-deploy/nodejs-image
  CONTAINER: nodejs-image

jobs:
  push_to_registry:
    name: Push Docker image to GitHub Packages
    runs-on: ubuntu-latest
    steps:
      - name: Check out the repo
        uses: actions/checkout@v2

      - name: Push to GitHub Packages
        uses: docker/build-push-action@v1
        with:
          username: ${{ github.actor }}
          password: ${{ secrets.GITHUB_TOKEN }}
          registry: ${{ env.REGISTRY }}
          repository: ${{ env.REPO }}
          tag_with_ref: true
  deploy:
    needs: [push_to_registry]
    name: Deploy to DigitalOcean
    runs-on: ubuntu-latest
    steps:
      - name: Setup SSH connection
        uses: webfactory/ssh-agent@v0.5.1
        with:
          ssh-private-key: ${{ secrets.SSH_KEY }}

      - name: Adding Known Hosts
        run: ssh-keyscan -H ${{ secrets.SSH_HOST }} >> ~/.ssh/known_hosts

      - name: Login to the GitHub Packages Docker Registry
        run: ssh ${{secrets.SSH_USER}}@${{secrets.SSH_HOST}} "docker login ${{env.REGISTRY}} -u ${{github.actor}} -p ${{secrets.GITHUB_TOKEN}}"

      - name: Pull latest container
        run: |
          ssh ${{secrets.SSH_USER}}@${{secrets.SSH_HOST}} "docker pull ${{env.REGISTRY}}/${{env.REPO}}:latest"
      - name: Stop deployed container
        continue-on-error: true
        run: |
          ssh ${{secrets.SSH_USER}}@${{secrets.SSH_HOST}} "docker stop ${{env.CONTAINER}}"
      - name: Remove deployed container
        continue-on-error: true
        run: |
          ssh ${{secrets.SSH_USER}}@${{secrets.SSH_HOST}} "docker rm ${{env.CONTAINER}}"
      - name: Start docker container
        run: |
          ssh ${{secrets.SSH_USER}}@${{secrets.SSH_HOST}} "docker run -p 8080:8080 -d --name=${{env.CONTAINER}} ${{env.REGISTRY}}/${{env.REPO}}:latest"
      - name: Logout from the GitHub Packages Docker Registry
        run: ssh ${{secrets.SSH_USER}}@${{secrets.SSH_HOST}} "docker logout ${{env.REGISTRY}}"
Now we can commit and push your workflow to run into the master branch!
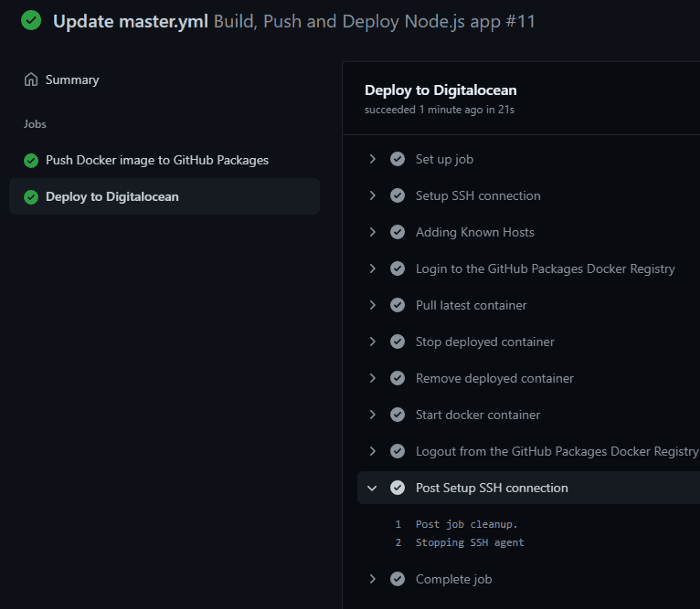
Workflow should be triggered automatically since we performed a push action to the master branch.
If you did everything right, you will not get any error in the execution:
And now it’s time to check our deployed application works on the remote server. Let’s run a query to your host:8080 or a domain if it’s configured on your machine:
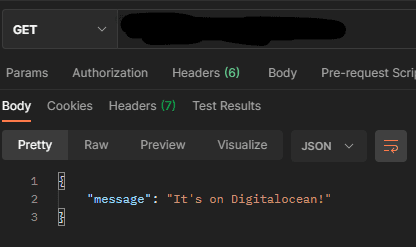
As you can see everything works great!
Conclusion
In this tutorial, we created a Node.js and dockerized it according to best practices and then deployed it using GitHub Actions, GitHub Packages, and DigitalOcean droplet.
Note:
GitHub Packagescan be substituted by another container registry according to the action documentation, and instead ofDigitalOceancan be used anotherVPS. You’re free to customize this configuration according to your needs.
Conclusion
In this tutorial, we created a Node.js and dockerized it according to best practices and then deployed it using GitHub Actions, GitHub Packages, and DigitalOcean droplet.
Note: GitHub Packages can be substituted by another container registry according to the action documentation, and instead of DigitalOcean can be used another VPS. You’re free to customize this configuration according to your needs.
Thanks for reading!
Article created by Taimoor